
How to Hang Golf Clubs on the Wall? Golf enthusiasts understand the importance of keeping their prized clubs organized and easily accessible. Whether you’re a seasoned player or a casual golfer, finding an efficient storage solution for your clubs can significantly enhance your overall golfing experience. One popular method gaining traction among golfers is hanging golf clubs on the wall.
Not only does this method save valuable space, but it also adds a stylish touch to your home or garage. In this guide, we’ll explore the step-by-step process of hanging golf clubs on the wall, from selecting the right wall mount to maintenance tips for preserving your clubs.
Read also: What Is a Golf Shirt?
How to Hang Golf Clubs on the Wall?
There are several ways to hang golf clubs on the wall, each with its own advantages and disadvantages. Here are some popular methods with steps on how to achieve them:
Wall Racks:
- Choose a rack: There are various rack designs available, from simple vertical ones to horizontal display models. Consider the number of clubs you want to display, the desired layout, and your budget.
- Mark the wall: Use a level to ensure the rack will be straight. Measure and mark the mounting holes according to the rack’s instructions.
- Drill pilot holes: Pre-drill holes to prevent the wall from cracking, especially if using drywall anchors.
- Mount the rack: Use appropriate screws and anchors based on your wall material (e.g., drywall, concrete). Follow the rack’s instructions for secure mounting.
- Arrange the clubs: Place the clubs in the rack’s designated slots or cradles. Some racks allow for specific club orders, while others offer more flexibility.
Using Shadow Box:
- Choose a shadow box: Select a box large enough to accommodate your desired club arrangement. Consider the box’s depth to ensure club heads don’t touch the glass.
- Prepare the backboard (optional): If you want a custom background, cut a foam board or fabric to fit the box’s back.
- Mount the backing (optional): Secure the backing to the box’s back panel using glue or tape.
- Position the clubs: Arrange the clubs within the box, potentially using foam blocks or padding for stability. You can create a creative display or follow a specific order.
- Mount the shadow box: Attach the box securely to the wall using appropriate hardware based on your wall material.
Open-Frame Display or Wall Hooks:
- Choose the display/hooks: Open-frame displays offer a similar concept to shadow boxes without the front glass. Select sturdy wall hooks that can hold the club weight comfortably.
- Mark the wall: For both options, mark the mounting points on the wall, ensuring level placement and spacing between hooks/display bars.
- Drill pilot holes: Pre-drill as needed based on your wall material and chosen hardware.
- Mount the display/hooks: Secure the chosen system to the wall using appropriate screws and anchors.
- Hang the clubs: Carefully hang each club on the designated hooks or slots in the display.
Additional methods:
- Using Staff Bag: Hang the bag itself on a sturdy wall hook or create a custom mount for a more polished look.
- Using X-Hanger: This specialized hanger cradles the club’s grip, offering a unique display option. Follow the hanger’s instructions for mounting and club placement.
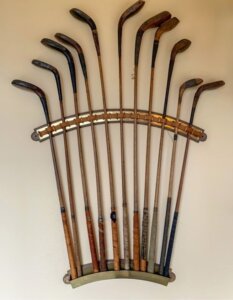
- Fan-Pattern Display: Screw hooks into the wall in a fan-like pattern and hang the clubs individually for a visually striking display.
Tips:
- Consider the weight of your clubs and choose mounting methods that can support them securely.
- Use protective padding or spacers to prevent damage to the clubs and your wall.
- Think about the aesthetics and choose a method that complements your space and style.
- If you’re unsure about drilling into walls, opt for adhesive mounting solutions suitable for lighter club weights.
Remember, these are just general steps, and specific instructions may vary depending on your chosen method and materials. Customize the approach to fit your unique needs and preferences.
Read also: How Fast Can a Golf Cart Go?
Why Hang Golf Clubs on the Wall?
The decision to hang your golf clubs on the wall offers several advantages. Firstly, it maximizes space utilization, especially in tight or cluttered areas like garages or storage rooms. By vertically mounting your clubs, you free up valuable floor space for other equipment or activities. Additionally, hanging your clubs adds a decorative element to your space, turning your golf collection into a visual focal point.
Choosing the Right Wall Mount
Preparation
Start by selecting a suitable wall space for mounting your clubs. Ideally, choose a location that is easily accessible and away from direct sunlight or moisture. Once you’ve identified the spot, gather the necessary tools for installation, including a drill, screws, and a level.
Installation Steps
Tips for Proper Alignment
To achieve a clean and organized look, pay attention to the alignment of your golf clubs. Ensure that there is uniform spacing between each club to avoid overcrowding. Additionally, adjust the height of the hooks or brackets to accommodate the varying lengths of your clubs, ensuring a visually pleasing display.
Maintenance and Care
To preserve the condition of your golf clubs and wall mounts, it’s essential to perform regular maintenance. Clean your clubs regularly to remove dirt and debris that can accumulate over time. Additionally, inspect the wall mount periodically to ensure that it remains securely attached to the wall.
Alternative Hanging Methods
While wall mounting is a popular choice, there are alternative methods for hanging golf clubs. Specialized golf club racks offer a freestanding solution that can be placed anywhere in your home or garage. For those seeking a DIY approach, consider repurposing household items such as PVC pipes or wooden shelves to create custom storage solutions for your clubs.
Conclusion
Hanging golf clubs on the wall is a practical and stylish storage solution for golf enthusiasts of all levels. By following the steps outlined in this guide, you can create a space-saving display that showcases your clubs while keeping them organized and easily accessible. Whether you opt for a wall-mounted system or explore alternative hanging methods, proper maintenance, and care will ensure that your clubs remain in top condition for years to come.
FAQs
1. Can I hang all types of golf clubs on the wall? Yes, wall mounts are designed to accommodate various types and sizes of golf clubs, including drivers, irons, and putters.
2. Will hanging my golf clubs on the wall damage them? When installed correctly, wall mounts provide secure support for your clubs without causing any damage.
3. How do I clean my golf clubs once they’re hung on the wall? You can clean your clubs using a mild detergent and water solution, along with a soft-bristled brush to remove dirt and debris.
4. Can I install a wall mount for my golf clubs myself? Yes, most wall mounts come with installation instructions and the necessary hardware for DIY installation.
5. Are there any specific maintenance tasks I should perform regularly? It’s a good idea to periodically inspect the wall mount for stability and clean your clubs to prevent buildup that can affect their performance.