
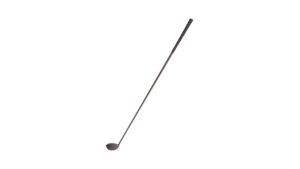
Golf clubs are like loyal companions to golfers, accompanying them through every swing, every game. Over time, however, even the most reliable clubs can start to show signs of wear and tear, affecting your performance on the course. One common issue golfers face is a worn-out or improperly fitted shaft. But fear not! With the right tools, materials, and know-how, you can easily reshaft your golf club and breathe new life into your game.
we’ll explore:
- Signs You Need to Reshaft Your Golf Club
- Step-by-Step Guide to Reshafting a Golf Club
- How much does it cost to Reshaft a golf club?
Understanding Golf Club Shafts
Before diving into the reshafting process, it’s crucial to understand the role of the golf club shaft. The shaft is more than just a connector between the clubhead and the grip; it plays a significant role in determining the club’s performance. Shafts come in various materials such as steel, graphite, and composite, each offering different characteristics in terms of weight, flex, and feel. Understanding these differences is essential for choosing the right shaft for your swing style and preferences.
Read also: Are golf shirts business casual?
Signs You Need to Reshaft Your Golf Club

When it comes to your golf game, the performance of your equipment can make all the difference between sinking that perfect shot or missing the mark. Your golf club shaft is a critical component that directly impacts your swing and overall game. Here are some signs that indicate it might be time to consider reshafting your golf club:
1. Visible Wear and Tear
- Scratches, Dents, or Rust: Examine the shaft closely for any visible signs of damage, including scratches, dents, or rust. These can weaken the structural integrity of the shaft and affect its performance.
2. Decreased Performance
- Loss of Accuracy: If you find yourself consistently missing shots or struggling to maintain accuracy, it could be due to a worn-out or improperly fitted shaft.
- Decreased Distance: A noticeable decline in the distance your shots travel despite making proper swings may indicate that the shaft is no longer providing the necessary power transfer.
3. Changes in Feel
- Inconsistent Feel: Pay attention to how the club feels during your swing. If you notice any inconsistencies or vibrations that weren’t present before, it could be a sign of shaft issues.
- Loss of Responsiveness: A lack of responsiveness or feedback from the club during impact can suggest that the shaft has lost its elasticity and responsiveness.
4. Shaft Flex Irregularities
- Visible Flexing or Bowing: Inspect the shaft while making practice swings. If you notice visible flexing or bowing during the swing, it may indicate that the shaft has become too flexible or has developed weak spots.
5. Clubhead Misalignment
- Twisting or Torquing: Check the alignment of the clubhead during your swing. If you observe any twisting or torquing of the clubhead relative to the shaft, it could be a sign of a loose or damaged connection.
6. Age and Usage
- Longevity of Use: Consider the age and usage history of the club. Over time, continuous use and exposure to the elements can lead to natural wear and deterioration of the shaft, necessitating replacement.
7. Personal Performance Goals
- Desire for Improvement: If you’re striving to improve your game or make specific adjustments to your swing, selecting a new shaft with different characteristics may be beneficial.
Read also: What to Wear to a Golf Tournament?
Preparing for Reshafting
Before embarking on the reshafting journey, gather all the necessary tools and materials. You’ll need a heat gun or torch, solvent, epoxy, shaft extractor, and grip tape, among other supplies. It’s also crucial to ensure you have a safe and well-ventilated workspace, as some steps in the process involve using heat and chemicals.
Step-by-Step Guide to Reshafting a Golf Club
Removing the Old Shaft
Begin by securely clamping the club in a vise and applying heat to the hosel using a heat gun or torch. This softens the epoxy holding the shaft in place, making it easier to remove. Once the epoxy is heated, use a shaft extractor to gently pull out the old shaft.
Preparing the Clubhead and New Shaft
Clean the hosel thoroughly to remove any remaining epoxy residue. Then, prep the new shaft by applying solvent to the tip to remove any protective coating. Once clean, apply a thin layer of epoxy to the tip of the shaft and the inside of the hosel.
Installing the New Shaft
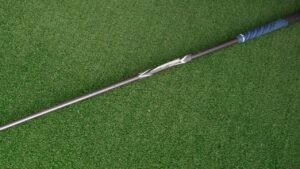
Carefully insert the new shaft into the hosel, ensuring it aligns correctly with the clubhead. Wipe off any excess epoxy and let the club sit undisturbed for the recommended curing time.
Adjusting the Club’s Specs
Depending on the shaft’s characteristics and your swing preferences, you may need to adjust the club’s specs such as loft, lie, and swing weight. Consult with a professional club fitter if you’re unsure about these adjustments.
Read also: How to be a golf caddy?
Tips for Success
To ensure a successful reshafting experience and optimize the performance of your golf club, here are some essential tips to keep in mind:
1. Choose the Right Shaft:
- Select a shaft that matches your swing speed, tempo, and preferences. Consider factors such as material, flex, and weight to find the best fit for your game.
2. Use High-Quality Epoxy:
- Invest in a high-quality epoxy specifically designed for golf club assembly. This ensures a strong and durable bond between the shaft and the clubhead.
3. Apply Epoxy Sparingly:
- Apply epoxy sparingly to avoid excess buildup, which can affect the club’s balance and performance. A thin, even layer of epoxy is sufficient for a secure bond.
4. Ensure Proper Shaft Alignment:
- Double-check the alignment of the new shaft with the clubhead before the epoxy cures. Proper alignment ensures optimal performance and prevents mis-hits.
5. Clean Thoroughly:
- Clean the hosel area of the clubhead and the tip of the new shaft thoroughly before applying epoxy. Any residue or debris can compromise the bond between the shaft and the clubhead.
6. Allow Sufficient Curing Time:
- Follow the manufacturer’s instructions for curing time when applying epoxy. Avoid disturbing the club during this time to ensure a strong and lasting bond.
7. Check Swing Weight:
- After reshafting, test the swing weight of the club to ensure it matches your preferences. Make adjustments if necessary to achieve the desired feel and balance.
8. Double-Check Grip Installation:
- Ensure the grip is installed securely and aligned properly with the clubhead. Use grip tape and solvent to facilitate installation and prevent slippage during use.
9. Test Before Use:
- Swing the club gently and make practice swings to test its feel and performance before taking it out on the course. Make any final adjustments as needed.
10. Seek Professional Help if Necessary:
- If you’re unsure about any aspect of the reshafting process or encounter difficulties, don’t hesitate to seek assistance from a professional club fitter or golf technician.
By following these tips and taking your time during the reshafting process, you can ensure that your golf club performs at its best and enhances your game on the course.
Testing and Adjusting

Testing and adjusting your reshafted golf club is a crucial step to ensure optimal performance on the course. Here’s how to effectively test and make any necessary adjustments:
1. Swing Testing:
- Swing the Club: Take several practice swings with the reshafted club to get a feel for its performance.
- Pay Attention to Feel: Notice how the club feels during the swing, including the weight distribution and balance.
- Evaluate Ball Flight: Observe the trajectory and flight of the ball to assess the club’s accuracy and distance.
2. Feedback Analysis:
- Listen for Vibrations: Pay attention to any vibrations or unusual sounds during impact, which could indicate issues with the shaft or clubhead connection.
- Feel for Consistency: Ensure that the club provides consistent feedback with each swing, indicating a stable and reliable setup.
3. Swing Weight Testing:
- Check Swing Weight: Use a swing weight scale to measure the swing weight of the reshafted club. Ensure it matches your preferred specifications for feel and control.
- Adjust if Necessary: If the swing weight is not within the desired range, consider adding weight to the clubhead or adjusting the grip to achieve the desired balance.
4. Fine-Tuning Adjustments:
- Loft and Lie Angle: Verify that the loft and lie angles of the club are set correctly for your swing characteristics. Make adjustments if needed to optimize ball flight and shot accuracy.
- Shaft Flex: Assess whether the shaft flex matches your swing speed and tempo. Consider experimenting with different shaft flex options if the current one doesn’t provide the desired performance.
- Grip Size and Texture: Evaluate the grip size and texture to ensure a comfortable and secure grip during the swing. Adjust the grip if necessary to improve control and feel.
5. On-Course Testing:
- Take It to the Course: Play a few rounds with the reshafted club to assess its performance in real-game situations.
- Monitor Consistency: Pay attention to how the club performs across various lies, conditions, and shot types. Look for consistency in distance, accuracy, and trajectory.
- Note any Adjustments: Keep track of any adjustments or tweaks you make during on-course testing to fine-tune the club’s setup further.
Conclusion
Reshafting a golf club may seem like a daunting task, but with the right tools and guidance, it’s a manageable DIY project that can breathe new life into your equipment. By understanding the role of the shaft, recognizing signs of wear, and following a step-by-step process, you can keep your clubs in top condition and elevate your game on the course.
FAQs
- How often should I reshaft my golf clubs?
- Generally, golf club shafts can last several years with proper care and maintenance. However, if you notice significant wear or a decline in performance, it may be time to consider reshafting.
- Can I reshaft my golf clubs at home, or should I seek professional help?
- While reshafting can be done at home with the right tools and knowledge, it’s essential to proceed with caution, especially if you’re unfamiliar with the process. If you’re unsure, consulting a professional club fitter is always a safe option.
- Is it possible to reuse the old shaft after removing it from the club?
- In some cases, the old shaft may still be usable, especially if it’s in good condition and the reason for reshafting was a desire for a different shaft type or flex. However, it’s essential to inspect the shaft carefully for any signs of damage or wear before reusing it.
- Do different types of golf club shafts require different reshafting techniques?
- While the basic process of reshafting remains the same regardless of the shaft type, certain materials may require specific handling. For example, graphite shafts may require more caution when applying heat to avoid damage.
- How can I tell if the new shaft is the right fit for my swing?
- The best way to determine if a shaft is the right fit for your swing is through trial and error. Experiment with different shaft flexes and materials to find the one that provides the optimal balance of distance, accuracy, and feel for your game.