Golf carts are a convenient mode of transportation on the golf course, but a flat tire can quickly turn a leisurely round into a frustrating experience. Knowing how to change a golf cart tire is a valuable skill that can save you time and stress. In this guide, we’ll take you through the process step by step, ensuring that you can get back to enjoying your game with minimal hassle.
Read also: How Many Golf Clubs Can You Carry in 2024?
How do you remove a golf cart tire from the wheel?
Removing a golf cart tire from the wheel involves two main steps: detaching the wheel from the cart and then breaking the tire bead from the rim. Here’s a breakdown:
Detaching the wheel:
- Safety first: Ensure the golf cart is parked on level ground and the parking brake is engaged. Chock the wheels on the opposite side of the one you’re working on.
- Loosen the lug nuts: Before jacking up the cart, slightly loosen the lug nuts with a socket wrench of the appropriate size. Do not remove them completely.
- Jack up the cart: Use a suitable jack point on the frame (check your golf cart manual) and raise the side with the flat tire until the wheel is off the ground. Secure the jack with jack stands.
- Remove the lug nuts: Completely remove the lug nuts and carefully set them aside.
- Pull the wheel: Pull the wheel straight off the hub.
Breaking the tire bead:
- Deflate the tire: Completely remove the valve stem cap and use a valve stem tool to depress the pin, allowing the air to escape.
- Break the bead: Use two tire irons (lever-style tools) to pry one side of the tire bead off the rim. Insert one iron under the lip of the rim and another a few inches away. Push down on the irons to lever the bead over the rim edge. Repeat this process around the entire tire to break the bead on both sides.
- Protect the rim: Place a rag or other protective material over the exposed rim edge to prevent scratches during the next step.
- Remove the tire: With the bead broken, pull the tire off the rim. You may need to use some muscle or pry gently with the tire irons.
Additional Tips:
- Lubricate the tire bead with soapy water to make it easier to break.
- Be careful not to damage the tire or rim during the removal process.
- If you’re not comfortable doing this yourself, it’s best to seek help from a qualified mechanic.
Remember, safety is paramount. If you’re unsure about any step, consult a professional.
Read also: How to Test Golf Cart Batteries?
Where do you put a TYRE jack?
When using a tire jack to lift a vehicle, it’s crucial to place the jack in the right location to ensure safety and stability. Here are the general steps for positioning a tire jack:
- Consult Your Vehicle Manual: Always refer to your vehicle’s manual for specific instructions and guidelines on where to place the jack. The manual will provide information on designated jack points.
- Locate the Jack Points: Typically, vehicles have designated jack points along the frame or undercarriage. These are reinforced areas designed to handle the weight of the vehicle when lifted. Common jack points include the front and rear axles.
- Position the Jack Under the Vehicle: Once you’ve identified the jack points, position the tire jack under the vehicle, ensuring that the saddle of the jack (the part that makes contact with the vehicle) is aligned with the designated jack point.
- Stabilize the Jack: Ensure the jack is on a stable and level surface. If you’re changing a tire on the side of the road, find a flat and solid area to place the jack. Avoid using a jack on uneven or soft surfaces.
- Use Proper Technique: When lifting the vehicle, follow the proper technique outlined in your vehicle’s manual. This often involves using a smooth, steady motion to avoid any sudden shifts or instability.
- Lift the Vehicle: Use the jack handle or lever to lift the vehicle until the tire is off the ground. It’s essential to lift the vehicle high enough to provide ample space for removing the flat tire and installing the spare.
- Secure the Vehicle: Once the tire is changed, carefully lower the vehicle using the jack, ensuring it is securely placed back on the ground. Double-check that the lug nuts are properly tightened before driving.
Remember, safety is paramount when using a tire jack. Always follow the specific guidelines provided by your vehicle’s manufacturer, and exercise caution to prevent accidents or damage to the vehicle.
Golf cart Tire Changer Tools
There are two main approaches to changing a golf cart tire: using dedicated tools or leveraging manual methods with readily available tools. Here’s a breakdown of the tools you’ll need for each approach:
Dedicated Golf Cart Tire Changer Tools:
-
Golf Cart Tire Changer: This machine simplifies the tire-changing process by mechanically breaking the bead and removing the tire from the rim. It’s available in manual and powered options.

-
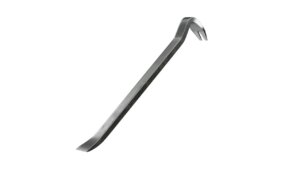
Tire Irons: While the tire changer might eliminate their need for bead breaking, having a set of tire irons on hand is always a good idea, especially for situations when you’re away from your changer or using a different method.
-
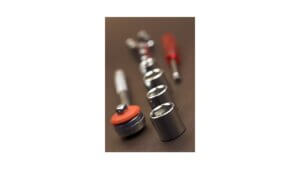
Socket Wrench and Lug Nut Socket: This is used to loosen and tighten the lug nuts that secure the wheel to the hub.
-
Valve Stem Tool: This tool helps remove the valve stem core to deflate the tire.
-
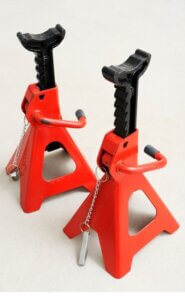
Jack and Jack Stands: These are essential for safely raising the golf cart and securing it while you work on the tire.
-
Tire Pressure Gauge: This is used to check and adjust the air pressure in the new tire.
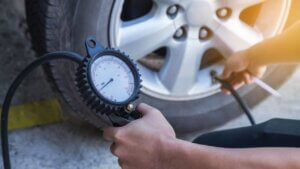
Tire Pressure Gauge -
Lubricant: A lubricant like soapy water can help ease the bead off the rim.

Manual Methods with Common Tools:
-
Pry Bars: Two sturdy pry bars can be used to manually break the tire bead, but exercise caution to avoid damaging the rim.
-
Screwdrivers: Large, flat-head screwdrivers can also be used for prying, but use them with care to prevent bending or damaging them.
-
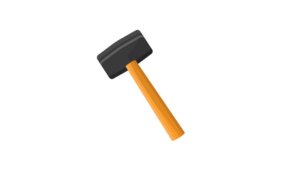
Hammer: A rubber mallet can help tap the tire off the rim after breaking the bead. Avoid using a metal hammer as it can damage the rim.
-
Clamps: Clamps can be used to secure the tire to the wheel while you work on removing it.
-
Other Tools: Depending on the specific situation, you might need additional tools like pliers, rags, and a flashlight.
Additional Tips:
- Regardless of the method you choose, ensure you’re working on a level surface with the parking brake engaged and the wheels chocked.
- It’s always recommended to consult your golf cart’s owner’s manual for specific instructions and safety precautions.
- If you’re not comfortable changing a tire yourself, seek help from a qualified mechanic.
Remember, safety is paramount when working on any vehicle, including golf carts. Choose the method and tools that you’re most comfortable with and always prioritize safety.
Read also: Golf
Understanding Your Golf Cart Tires
Pneumatic vs. Solid Tires
Golf cart tires come in two main types: pneumatic and solid. Understanding the differences between them helps in making informed decisions based on your usage and preferences.
Importance of Proper Tire Maintenance
Proper maintenance, including regular checks and addressing issues promptly, is key to ensuring a smooth and safe ride. It also contributes to the longevity of your golf cart tires.
Signs Your Golf Cart Tire Needs Changing
Uneven Wear and Tear
Identifying uneven wear patterns on your tires is a clear indicator that it’s time for a change. Addressing this issue promptly can prevent further damage to the golf cart.
Loss of Tire Pressure
Tire pressure plays a pivotal role in the overall performance, safety, and fuel efficiency of your golf cart. A noticeable loss of tire pressure can lead to various issues, affecting the quality of your ride and potentially causing long-term damage to the tires. In this section, we will delve into the reasons behind a loss of tire pressure, how to troubleshoot the issue, and effective solutions to address it.
1. Identifying the Signs:
When you observe a gradual or sudden loss of tire pressure in your golf cart, it’s crucial to recognize the signs promptly. This may include a visibly sagging tire, a change in the cart’s handling, or even a visual inspection that reveals a noticeably deflated tire.
2. Causes of Tire Pressure Loss:
Several factors can contribute to a loss of tire pressure, ranging from external damage to internal issues. Common causes include punctures from sharp objects, damaged valve stems, bead leaks, or even a slow leak due to natural wear and tear.
3. Troubleshooting the Issue:
Before proceeding with a tire replacement, it’s essential to troubleshoot the problem to determine the root cause. Start by visually inspecting the affected tire for any visible punctures, foreign objects, or damage. Additionally, check the valve stem for signs of wear or leakage.
4. Fixing Simple Punctures:
If the loss of pressure is due to a small puncture, it may be possible to repair the tire using a patch kit. Locate the puncture, remove any foreign object, and follow the instructions on the patch kit to effectively seal the hole. Ensure proper inflation after the repair.
5. Replacing Damaged Valve Stems:
Valve stems can degrade over time, leading to air leakage. If the valve stem is identified as the culprit, replacing it is a straightforward solution. Use a valve stem tool to remove the old stem and install a new one, ensuring a secure fit.
6. Professional Inspection:
In cases where the cause of the pressure loss is unclear or if multiple attempts at repair prove unsuccessful, seeking professional inspection is advisable. A tire specialist can use advanced techniques to identify hidden issues and recommend appropriate solutions.
7. Preventive Measures:
To minimize the risk of future tire pressure loss, adopt preventive measures such as regular tire inspections, maintaining the recommended tire pressure, and avoiding rough terrain that may cause damage. Proactive care can significantly extend the lifespan of your golf cart tires.
8. Importance of Regular Maintenance:
Loss of tire pressure often highlights the importance of routine maintenance. Regularly checking and maintaining proper tire pressure not only ensures a smooth ride but also contributes to the overall safety and performance of your golf cart.
Visible Damage or Punctures
Visible damage or punctures are obvious signs that your golf cart tire needs attention. We’ll guide you on how to assess the extent of the damage and what steps to take next.
Read also: How Many Golf Lessons Should I Take 2024
Necessary Tools and Equipment
Creating a Checklist
Before diving into the tire-changing process, having a checklist of necessary tools and equipment ensures a smoother experience.
Benefits of Regular Golf Cart Tire Maintenance
Regular maintenance of your golf cart tires brings a bouquet of benefits, enhancing both longevity and performance. By routinely inspecting, inflating, and addressing issues promptly, you extend the life of your tires, saving on replacement costs.
Well-maintained tires also deliver a smoother and safer ride, improving overall performance, traction, and stability. This proactive care not only safeguards your investment but ensures each journey is a delightful and secure experience for you and your passengers.
Exploring Advanced Tire Options
Conclusion
In conclusion, mastering the art of changing a golf cart tire not only empowers you with a practical skill but also ensures a seamless and enjoyable ownership experience. By adhering to safety protocols, understanding your tires, and following a meticulous step-by-step guide, you’ve embraced the essence of proactive maintenance. Remember, the benefits extend beyond the immediate satisfaction of a job well done.
Regular tire care translates to extended lifespan, improved performance, and enhanced safety for both you and your passengers. As you confidently navigate the process of lifting, changing, and securing the tires, you’re not just maintaining a vehicle – you’re investing in the longevity and optimal functionality of your golf cart.
So, embrace the journey, savor the satisfaction of a well-executed tire change, and relish in the enhanced rides that await you on the golf course or wherever your adventures may lead. Happy driving!
FAQs
- How often should I inspect my golf cart tires? Regular inspections are recommended at least once a month, and more frequently if you notice any unusual wear or issues.
- Can I use any tire for my golf cart, or are there specific recommendations? It’s crucial to use tires recommended by the golf cart manufacturer to ensure proper fit and performance.
- Is it possible to repair a punctured golf cart tire, or do I need to replace it? Small punctures can often be repaired, but extensive damage may require a tire replacement. We’ll guide you on how to make the distinction.
- What is the lifespan of a typical golf cart tire? The lifespan varies based on factors like usage, maintenance, and tire type. We’ll provide insights into maximizing the lifespan of your golf cart tires.
- Can I change a golf cart tire on my own, or should I seek professional help? While changing a golf cart tire is a manageable DIY task, some may prefer professional assistance. We’ll discuss when it’s appropriate to seek help and when you can confidently tackle the task yourself.